

June 6, 2025
Rumpus suports 2 factor authentication for SFTP and HTTP/HTTPS. For users accessing the Rumpus server via Web browser, this means supplying a password as the first factor and confirming the user's e-mail access for the second. Let's take a look at how it works, and how to set it up.
How Users Will Authenticate
With 2 factor authentication enabled, when users first connect via Web browser, they will be asked for their user account name.
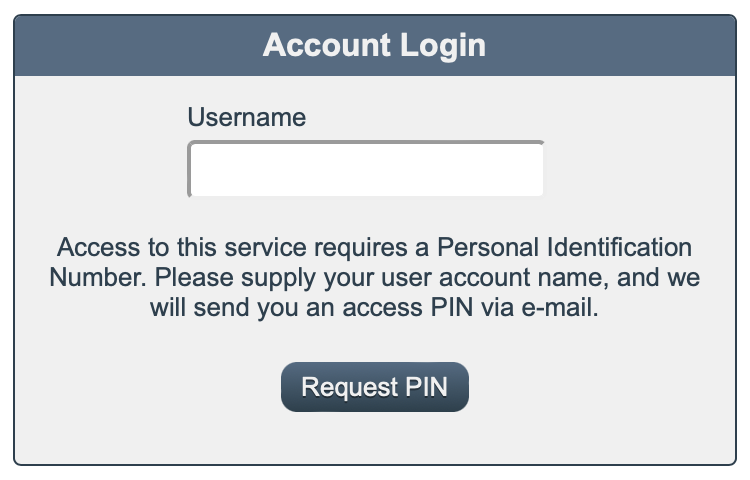
When the user supplies their account name and clicks "Request PIN", Rumpus will send the user an e-mail with an access PIN and will then display the account login box that prompts for both the PIN and their password.
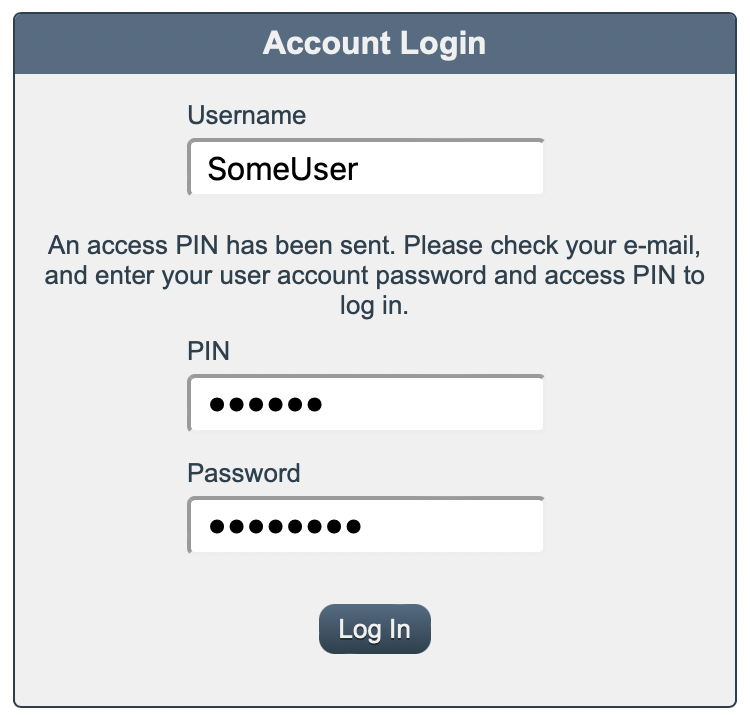
To complete the login, the user will need to supply both the access PIN that was e-mailed to them and their password.
Setting It Up
In order for Rumpus to e-mail users a PIN, it will need to know the e-mail address of every user. So the first step in setting up 2 factor auth in Rumpus is to make sure you have entered the e-mail address of every user. This is done on the User Accounts window, User Info tab.
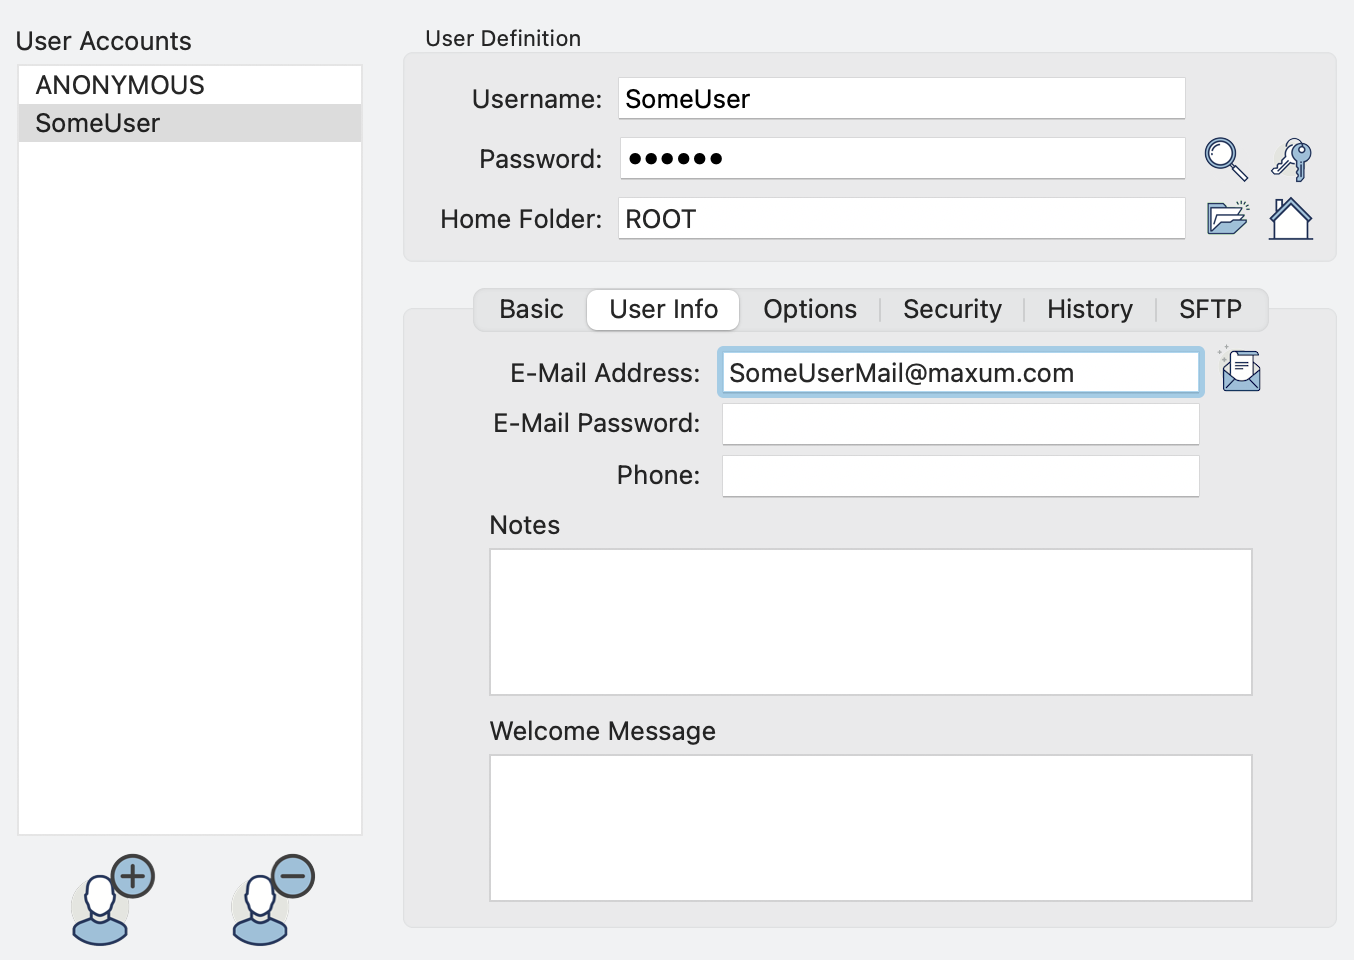
Notice that Rumpus also allows you to enter the user's e-mail password, but that is only required for sending mail from a user account. The password isn't needed to send the PIN e-mail to the user, so you can leave the password field empty for the purposes of 2FA.
Next, you'll need to create the e-mail message users will receive when requesting their PIN. We define e-mail messages on the Event Notices window. Create a new Event Notice of the notice type "E-Mail" and configure the notice to send e-mail from your administrative e-mail account. Rumpus will automatically send the PIN e-mail to the correct address (as specified on the User Accounts window for each user), so don't worry about the "Mail To" field. You can leave the Mail To blank, or just enter your own e-mail address for testing purposes.
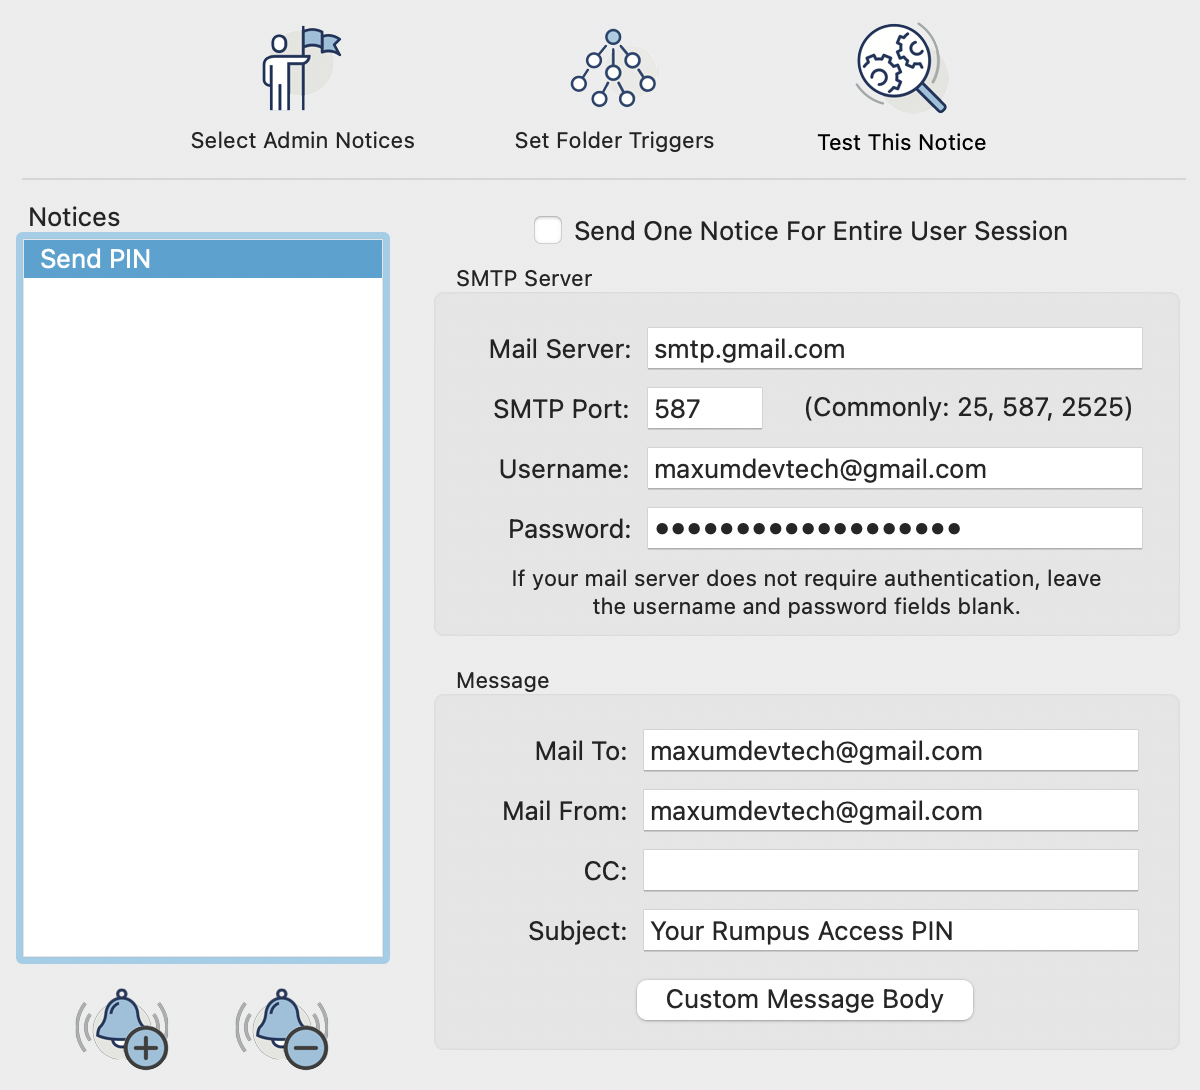
Click the "Custom Message Body" button to open the message body editor. To set up a simple message with the needed "ACCESSPIN" token, use the "Auto-Setup Message Body", "Event Type" pop-up menu and select "Send 2-Factor PIN".
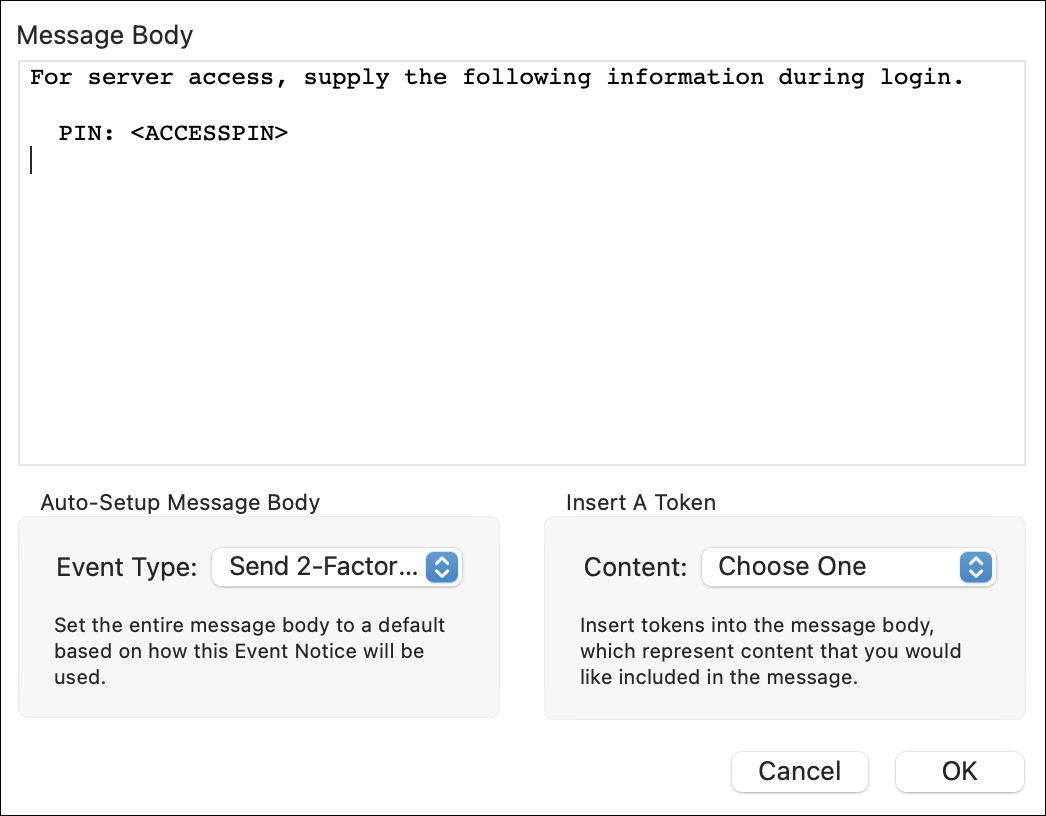
Feel free to edit the text of the e-mail to suit your needs. Just be sure that the "<ACCESSPIN>" token is included in the e-mail, as that tells Rumpus where to put the randomly generated PIN.
With user e-mail addresses defined, and an Event Notice to send the PIN e-mail, we're ready to enable 2 factor authentication. Open the Web Settings window and flip to the Authentication tab, where you'll find this setup box.
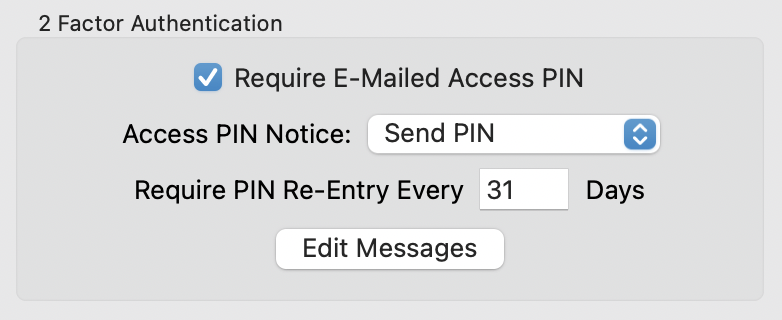
Turn the "Require E-Mailed Access PIN" option on and select the Event Notice you created earlier as the "Access PIN Notice".
Using Cookies For Quicker Access
Rumpus can tell the user's Web browser to set a cookie as the second authentication factor, so that the user doesn't have to go through the process of obtaining a new PIN every time they connect to the server. This saves the user from having to go through the PIN access process every time they log in. Authentication still requires 2 factors, but an automatically stored cookie replaces the PIN as the second factor. The time period that the cookie is preserved is set using the "Require PIN Re-Entry Every ... Days". By default, Rumpus sets the authentication cookie to expire every 31 days, but you can shorten or lengthen the period as is appropriate for your server. To require users to obtain an access PIN every time they log in to the server, set the "Require PIN Re-Entry Every ... Days" option to "0".
Final Note
The various messages that are displayed to the user during the PIN access process are all customizable. To customize the message in the e-mail users receive, edit the message body of the "Send PIN" Event Notice. Click "Edit Messages" to customize the various text messages displayed in the Web interface.
As always, if you have any trouble getting 2 factor authentication enabled on your server, contact Maxum technical support at support@maxum.com.